Making a Woodturners Chatter Tool
A tool for embellishing turnings

Step by step procedure
I must say that this isn't a tool that I have been anxiously awaiting to have. It's not a critical tool for the woodturning that I've been doing and major surface treatments just aren't something I normally do ... yet. Still, I had been mildly intrigued by doing some chatterwork on some of my smaller items and knew that this tool wouldn't be difficult to make myself. I was right!
Read on to learn how to make yourself a chatter tool easily...
As many woodturners are all to familiar with, chatter is usually considered a problem that must be overcome instead of something we strive to intentionally make. That terrible shriek of our gouges or scrapers skipping over the wood and causing those waves have to be fixed in our normal woodturning. Wouldn't it be nice if that were the "in" thing to have on the inside walls of all our bowls? And if we could reproduce that pattern every time we mean to as well? So, what causes those chatter marks that we all so hate when it doesn't serve our purpose? Basically, it means that either the wood or the tool is vibrating. The vibration causes the tool edge to touch the wood intermittently and cutting at those points. The wood may be so thin that it starts to vibrate or maybe it's in the process of "moving" out of round. The tool may be simply too small (thin diameter) for the job. It maybe extended over the toolrest too far or any number of other reasons. In these explanations lies how our chatter tool works.
The chatter tool is really just a very thin scraper. So thin, in fact, that it contacts the wood and flexes back off the wood. This sets up a vibration where the flexible tip of the tool keeps hitting the wood, bending back and so on. Each time it contacts the wood it scrapes just a little bit of the wood. This is what you see on the wood surface when the chatter tool is used. Here are some of the variables affecting the effect you'll get with a chatter tool:
1) How thick the scraper is
2) The stiffness of the scraper
3) Shape of the tip
4) How far the tip is extended past the holder
5) What wood is used - or - the hardness of it
6) Lathe speed
7) Tool tip presentation to the surface of the wood
8) How fast the tool is pulled across the wood
With all of these variables, you can achieve a huge range of possible effects. Enough to probably say that you'll never get the exact same effect twice! This creates a uniqueness that we often strive for in our woodturning. At least a little bit of it. This tool does take a bit of practice to use. Just keep fiddling with these variables and you'll soon get it down pat. Just don't blame me when you don't cringe at that high pitched shrieking sound when you're hollowing out that bowl so much the next time. You might actually leave those chatter marks in there! Skip to how to use the tool here.
Well, on with how to create my version of the shopmade chattertool. Remember, use what you have laying around, if possible. These things I had laying around.
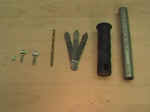 |
The basic components. A nut (used in case of problems ... see near the bottom), thumb screws, drill bit, automotive feeler gauges (thicker the better. Any kind of spring steel such as old jigsaw or reciprocating sawblades and even steel lawn rake "fingers" will work), handle which is optional but makes it look purdy (could be just tape or bicycle handlebar foam, etc.), and thin-walled conduit pipe (about any pipe will work here) |
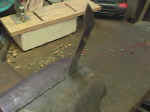 |
Bend your spring steel so that the tips are bent down a little. The feeler gauges I had were already like this but you can do it by just putting them in the vice or pliers and giving them a little bend |
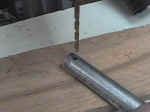 |
Drill an appropriate sized hole for your thumbscrew. Make it just a bit undersized so the thumbscrew will bite into the conduit and make a thread. Note: conduit is pretty strong stuff and may strip your thumbscrew. If so, look much further below when I do just that and have to fix it. |
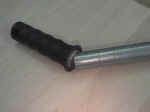 |
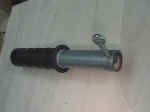
The handle I had just so happened to fit perfectly over the conduit. A handle isn't really necessary but it looks nice and is easy to hold. You could do just as well with tape or foam or just nothing. I had the handle so I used it. |
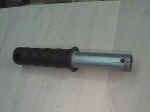 |
Tada! Not done yet. |
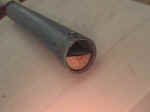 |
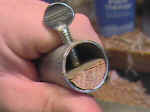
You need something inside to hold you chattering spring steel against. I just used a half piece of wood and glued it in there. |
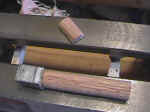 |
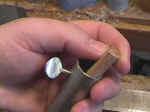
I made the half round wood by simply rounding off some split-turnings blanks I had made up out of red oak. Round it to size of the inside of the conduit and then split it apart again. You could just as well round a solid piece of wood and then cut it (carefully) down the middle or sand it that way. It doesn't have to be perfectly down the middle either. |
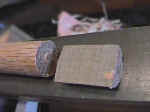 |
Here's a closeup. |
 |
Put it in there and glue it down. |
 |
Inside view. |
 |
Done yet? Nooooooooo. |
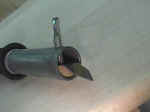 |
Gotta have that chattery thing that makes it all work! Here's the view of a feeler gauge with the pointy end. |
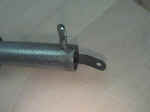 |
Here's the other end (it's double ended!) of that feeler gauge but this time it's rounded. Gives different effects when chattering. |
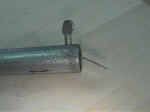 |
A side view showing the angle it's tipped down. Doesn't have to be this much. |
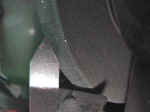 |
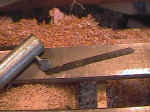
How to shape the tips. One of the secrets of a chatter tool is that you really do need that burr on the ends. Just like a scraper needs one (usually), the chattertool needs one too. |
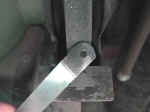 |
Rounded end. |
 |
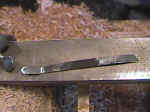
Here's a version made from an old jigsaw blade. I just ground off the teeth and shaped the ends as well as bending them a little. |
 |
|
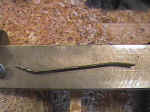 |
Doesn't that just look SEXY!? Yeah, well, that's when you know you've been out in the shop too long. |
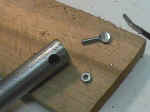 |
OOOooooppps! The thumbscrew stripped out so I have to fix that. The thumbscrew needs to really clamp down hard onto the chatter steel or it won't work. First, I drilled a larger hole. Large enough to hammer in a nut that will fit another (smaller in this case) thumbscrew. |
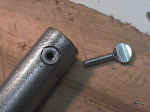 |
Hammer it in.... |
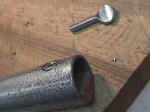 |
So that it fits snuggly. |
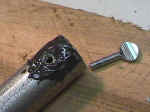 |
When you have it the way you want it, epoxy it in place. Or silver solder it in. Whatever you want. |
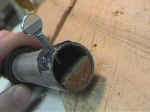 |
The finished ... fixed ..... chattertool. Let's get to chattering! |
 |
Of course, you could just use some hand pliers or "locking pliers" like the Vise-Grip brand along with the springy steel mentioned above. I only do this in a pinch (pun intended!) when I've either forgotten my chattertool; I got coaxed into demonstrating the chattertool when I wasn't supposed to be doing that; or some smart-ass suggests that it does just as well as a tool designed for the job.... |
 |
The reason I say the last thing above is because doing chatterwork with just some pliers ... even the locking pliers .... is even harder to do than with a tool handle made for the job. See that curve on the pliers? Almost every hand plier has some curve to it. Yes, even the long-necked ones. The problem with that curve (and it may not be a problem for those turners that don't care much what the chatter looks like) is that as you move your tool (the pliers in this case) along the toolrest, you've not only got everything else to worry about (see below), but now you have that curve to worry about. It makes a bigger difference than you might think! The slightest movement of that pliers' curve forward or backward on the toolrest makes a huge difference in what kind of chatter you get on the wood. Do yourself a favor. Forget using pliers for this unless you have no other choice. They're alright for demo'ing or if you have nothing else around but not if you want something to look good. |
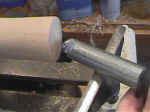 |
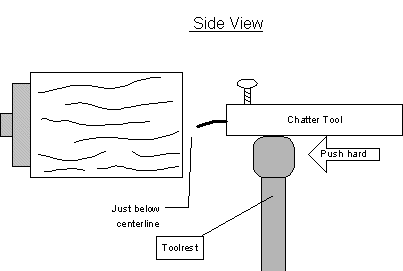
Now, I've got to say that this takes a bit of practice to get it to work. Hard wood, endgrain only (for the most part), a "skewed" angle and pushing fairly hard against the wood among other things make this work. Just practice and move things around and you'll get the hang of it. Start from the center and sweep outward. |
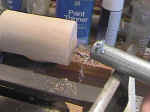 |
The angled chattering steel allows you to hold the tool pretty level. You still need to set the tool properly. Hope you can see it in the pictures that follow. |
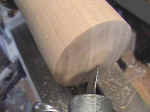 |
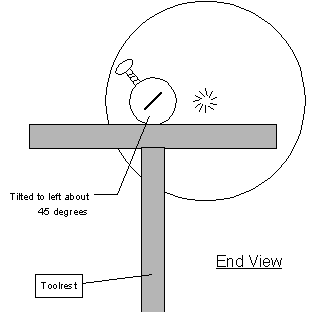
Rotate the tool to the left (counter-clockwise) so that the right side edge of the spring steel points to around the 1 or 2 o'clock position on a clockface. |
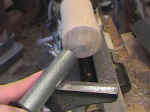 |
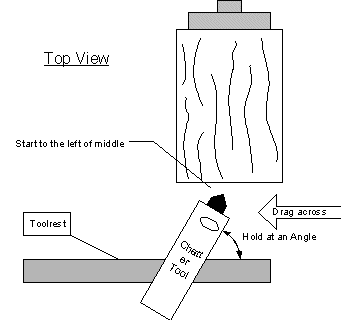
This is a "pulling" type of motion. So, the tip that's going to contact the wood if further toward the center of the spinning wood than is the handle portion of the tool. |
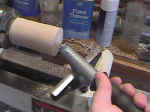 |
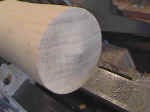
Pull the tool tip from center to the outside as far as you want. Make sure that your handle end of the tool is always "outside" of the tip of the tool. |
 |
The chatterwork! Click on the picture to see it up-close. It's light-colored wood ... tough to see. |
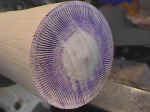 |
It's clearer on this light wood (Maple) when you color it. You can tell if it's working if you hear that squealing sound. Otherwise, you're just making grooves... at best. |
Here's some drawings I made so that maybe it's easier to see what's going on and how to hold it.
That's it! The catalogs list this tool at around $40US. I made this one out of about $3US of materials. Not bad, eh?
